Blog Layout

Metal vs Wood Drywall Framing

October 28, 2024

When it comes to drywall framing, choosing between metal and wood can significantly impact the durability, cost, and efficiency of your construction project. Both materials come with unique advantages and limitations, making the choice less straightforward than it may seem. For homeowners and contractors in Barrie, Ontario, understanding the specific benefits of each type of framing is essential for achieving the best results. Here, we’ll break down the differences between metal and wood drywall framing, along with considerations to help you decide which option is best for your project.


Why Does Framing Matter?

The framing of a wall is the structural “skeleton” that holds your drywall in place. The right framing ensures that your walls remain sturdy, soundproof, and long-lasting. It also impacts how easily electrical wiring, plumbing, and insulation can be added. With both metal and wood framing options available, your choice of material will play a key role in your project’s overall performance and aesthetics.


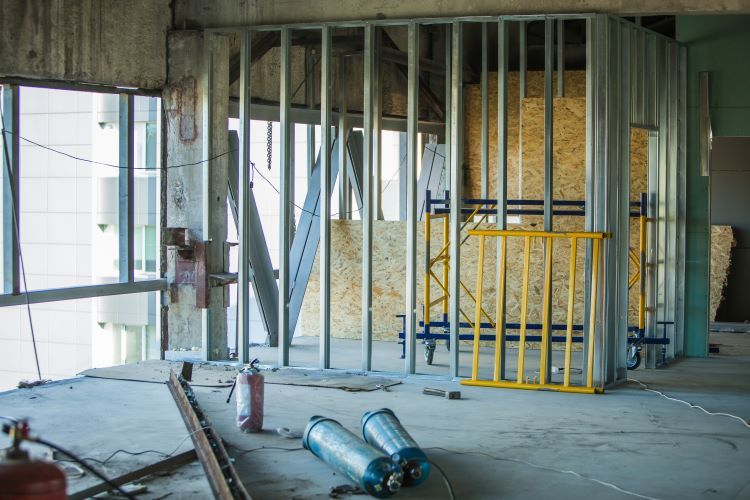
Metal Drywall Framing

Metal framing has become increasingly popular in both residential and commercial applications, and it’s especially ideal for areas with high moisture levels or the need for added fire resistance. Here are some key advantages and drawbacks of using metal framing for drywall.


Advantages of Metal Framing

  1. Durability and Resistance to Moisture and Fire
  • Metal is resistant to both moisture and fire, making it an excellent choice for basements, bathrooms, or kitchens where humidity can lead to rot and mold in wood framing.
  • Metal framing won’t warp, shrink, or twist, ensuring a stable and durable framework over time.
  1. Pest Resistance
  • Metal is impervious to pests, unlike wood, which can be susceptible to termites and other insects.
  • This makes metal a long-lasting choice for structural integrity, especially in environments where pest control is a concern.
  1. Eco-Friendly and Recyclable
  • Metal studs are recyclable, which makes them a sustainable option, especially for those concerned about the environmental impact of construction materials.
  • Unlike wood, which involves deforestation, metal framing materials can be manufactured from recycled materials, making them an eco-friendly choice.


Drawbacks of Metal Framing

  1. Higher Cost
  • Metal framing can be more expensive than wood, which may not fit all budgets, especially in larger projects.
  • While metal framing may provide long-term savings in maintenance, the initial investment is usually higher.
  1. Limited Insulation
  • Metal conducts temperature, which means it can create cold spots in walls unless insulation is carefully applied.
  • Additional measures may be necessary to ensure proper insulation, increasing labor and material costs.
  1. More Complex Installation Process
  • Metal studs require specialized fasteners and cutting tools, and the installation process can be more complex than wood framing.
  • Hiring a skilled contractor, like the professionals at Barrie Drywallers, ensures proper handling and installation.


Wood Drywall Framing

Wood remains a traditional and popular choice for drywall framing, especially in residential settings. It’s versatile, cost-effective, and widely available, but it does come with its own set of considerations.


Advantages of Wood Framing

  1. Ease of Installation
  • Wood framing is often easier to install, as wood studs are simple to cut, drill, and fasten.
  • The material is also readily available, making it easier to source in local hardware stores.
  1. Cost-Effective
  • Wood is typically more affordable than metal, which can make it the preferred option for budget-conscious projects.
  • It’s a practical choice for areas of the home where high humidity and fire resistance are not primary concerns.
  1. Better for Insulation
  • Wood naturally insulates better than metal, reducing the need for additional thermal breaks or insulation.
  • This makes wood an efficient choice for temperature control in climates like Barrie’s, where winters can be harsh.


Drawbacks of Wood Framing

  1. Vulnerability to Moisture and Fire
  • Wood is susceptible to warping, rotting, and mold when exposed to moisture. This makes it less suitable for basements or other areas with high humidity.
  • Wood is also combustible, which can pose a risk in areas requiring high fire resistance.
  1. Susceptibility to Pests
  • Wood framing can be vulnerable to termites, carpenter ants, and other pests.
  • Treating wood with pesticides and preservatives can help, but it requires ongoing maintenance.
  1. Can Shift or Warp Over Time
  • Over time, wood can expand, shrink, or warp due to changes in temperature and humidity. This can lead to drywall cracks and structural issues if not properly maintained.
  • Regular inspections and maintenance may be necessary to avoid these issues.


Choosing the Right Framing Material for Your Project

Your choice between metal and wood framing should depend on your specific needs, project budget, and the conditions of the environment where the framing will be installed.

  • For High-Moisture Areas: Metal framing is often the best choice for basements, bathrooms, and kitchens where moisture is a concern. The moisture resistance of metal prevents rot, mold, and mildew, ensuring a stable structure in areas exposed to water.
  • For Fire Safety Requirements: Metal is naturally fire-resistant and may be required in some commercial or high-safety applications. While wood framing can be treated with fire-resistant coatings, it doesn’t offer the same level of inherent safety as metal.
  • For Budget-Friendly Projects: Wood framing is generally more cost-effective and easier to install, making it a great choice for most residential applications where moisture and fire resistance aren’t top priorities.
  • For Insulation Needs: Wood framing provides better natural insulation and can help reduce heating and cooling costs. If you’re constructing in a climate with extreme temperature shifts, wood might provide more comfortable indoor conditions.


Conclusion

Both metal and wood drywall framing have their advantages and are suitable for different types of construction projects. Metal offers durability, moisture resistance, and fire safety, making it ideal for high-moisture or high-safety areas. On the other hand, wood is cost-effective, easy to install, and provides natural insulation, which makes it a preferred choice for most residential projects.


For a professional and high-quality framing job, trust Barrie Drywallers. Our team of experts understands the unique requirements of each project and can help you make the best choice for your drywall framing needs. Contact us today to discuss your project, and let’s find the ideal framing solution to bring your vision to life.

You Might Also Enjoy:

December 3, 2024
Installing drywall is a key step in transforming any space, whether it’s a new construction project or a home renovation. However, the success of drywall installation largely depends on how well the walls are prepared beforehand. At Barrie Drywallers , we know that proper preparation is the foundation of a smooth and efficient installation process. Here's a step-by-step guide to getting your walls ready for drywall installation . 1. Clear the Area Before you begin, ensure that the workspace is clean and clutter-free. Move furniture, cover floors with drop cloths, and remove any obstacles that might hinder the installation process. Why This Matters: A clean and open workspace minimizes the risk of damage and allows installers to work efficiently. 2. Inspect the Walls Carefully examine the walls for any issues that could affect the drywall installation, such as cracks, water damage, or uneven surfaces. What to Look For: Cracks or Holes: Repair these to provide a stable surface. Moisture or Mold: Address these issues immediately to prevent future damage. 3. Address Insulation Needs If your walls lack proper insulation, now is the time to install or upgrade it. Adequate insulation not only improves energy efficiency but also enhances soundproofing. Pro Tip: In areas prone to moisture, like basements, consider using moisture-resistant insulation materials. 4. Ensure Proper Framing Check that the wall studs are properly spaced and securely installed. The standard spacing for studs is 16 or 24 inches apart. Ensure they are level and aligned to avoid uneven drywall. Tools You’ll Need: Level: To check for straightness. Measuring Tape: To confirm correct spacing. 5. Install Vapor Barriers In areas like basements or bathrooms, adding a vapor barrier is crucial to prevent moisture from seeping into the walls. Material Options: Plastic Sheets: Cost-effective and easy to install. Specialized Paints: Ideal for areas requiring a seamless application. 6. Pre-Plan Electrical and Plumbing If your project involves electrical wiring or plumbing, make sure all these elements are installed and secured before drywall installation. Mark their locations clearly on the studs to avoid accidentally covering access points. What to Check: Ensure electrical boxes are flush with the intended drywall surface. Verify that plumbing pipes are securely anchored. 7. Clean and Prime the Surface Dust and debris on the walls can interfere with drywall adhesion. Use a broom, vacuum, or cloth to thoroughly clean the wall surface. Optional Step: Apply a primer to improve the adherence of joint compounds and paint after the drywall is installed. 8. Gather the Right Tools Having the necessary tools and materials on hand ensures a smooth installation process. Checklist: Drywall sheets Screws or nails Drywall tape and joint compound Utility knife and drywall saw Screw gun or drill Why Choose Barrie Drywallers? At Barrie Drywallers , we understand that a flawless drywall installation begins with meticulous preparation. Here’s why our clients in Barrie, Ontario, trust us: Expertise: Our experienced team knows the ins and outs of drywall preparation and installation. Quality Materials: We use only top-tier materials for durable, long-lasting results. Attention to Detail: We ensure every step is done right, from framing to finishing. Local Knowledge: As a trusted local company, we understand the unique needs of Barrie homes and businesses. Conclusion Proper wall preparation is the secret to a seamless drywall installation. By following these steps, you’ll create a sturdy foundation for your new walls, ensuring they look great and perform well for years to come. If you’re planning a drywall project and need expert assistance, Barrie Drywallers is here to help. Contact us today for professional, reliable drywall services tailored to your needs!
November 27, 2024
When it comes to drywall, the materials you choose can significantly impact your home's durability, appearance, and functionality. For homeowners and contractors in Barrie, Ontario, who prioritize quality and longevity, solid gypsum sheets stand out as a superior choice. At Barrie Drywallers , we believe in using only the best materials to provide flawless results that last for years. What Are Solid Gypsum Sheets? Solid gypsum sheets are drywall panels made primarily of gypsum, a natural mineral prized for its strength, fire resistance, and versatility. These sheets are sandwiched between layers of durable paper or fiberglass, resulting in a sturdy and reliable construction material suitable for various applications. Key Benefits of Solid Gypsum Sheets 1. Exceptional Durability Gypsum is naturally resilient, making solid gypsum sheets resistant to cracking and wear. This durability ensures that your walls and ceilings can withstand daily stresses, whether in a high-traffic residential area or a busy commercial space. 2. Superior Fire Resistance Safety is paramount, and solid gypsum sheets excel in fire resistance. Gypsum contains water in its mineral structure, which is released as steam when exposed to heat, slowing the spread of flames. Many solid gypsum sheets are fire-rated, making them an ideal choice for homes and businesses prioritizing safety. 3. Enhanced Soundproofing For those looking to create quiet, peaceful spaces, gypsum sheets are an excellent option. Their dense composition helps reduce noise transmission between rooms, making them perfect for offices, bedrooms, or entertainment areas. 4. Moisture and Mold Resistance In a climate like Barrie’s, where humidity levels can vary, moisture-resistant gypsum sheets are invaluable. These sheets are treated to resist water absorption, reducing the risk of mold and mildew growth in areas like bathrooms, basements, and kitchens. 5. Smooth and Versatile Finishing Solid gypsum sheets provide a smooth, even surface, perfect for painting, texturing, or wallpapering. Their versatility ensures a professional finish for any design style. Applications of Solid Gypsum Sheets Solid gypsum sheets are versatile and can be used in: Residential projects: Ideal for walls and ceilings in living rooms, bedrooms, and kitchens. Commercial spaces: Perfect for offices, retail stores, and restaurants needing durability and fire safety. Specialty areas: Moisture-resistant sheets are excellent for bathrooms and basements, while soundproofing options enhance theaters and recording studios. Why Choose Solid Gypsum Sheets Over Other Drywall Options? While there are various drywall options available, solid gypsum sheets stand out due to their: Longevity: Fewer repairs and replacements over time. Safety: Increased fire and mold resistance. Eco-Friendliness: Many gypsum sheets are recyclable and made with sustainable materials. Cost-Effectiveness: While slightly more expensive initially, their durability saves money in the long run. Tips for Installing Solid Gypsum Sheets Proper installation is crucial to maximizing the benefits of solid gypsum sheets. Here’s how Barrie Drywallers ensures a flawless finish: Accurate Measurements: Precise cutting minimizes gaps and ensures a seamless fit. Secure Fastening: Using the right screws and techniques to prevent sagging or movement. Expert Taping and Mudding: Achieving a smooth surface free of visible seams or imperfections. Finishing Touches: Applying primer and paint for a polished and professional look. Why Barrie Drywallers Is Your Go-To Choice At Barrie Drywallers, we specialize in using top-tier materials like solid gypsum sheets to deliver exceptional results. Our experienced team ensures that every project, whether residential or commercial , meets the highest standards of quality and durability. Conclusion Solid gypsum sheets are the ultimate choice for superior drywall, offering durability, safety, and versatility. Whether you’re renovating a home or building a new commercial space in Barrie, Ontario, investing in high-quality drywall materials will pay off in the long run. Ready to upgrade your walls with solid gypsum sheets? Contact Barrie Drywallers today for expert advice, professional installation, and unparalleled craftsmanship.
November 18, 2024
Drywall finishing is an essential step in any renovation or construction project. Whether you’re remodeling a single room or building a new home, achieving a smooth and polished look with drywall finishing can make all the difference in the final appearance of your space. At Barrie Drywallers , we understand that a high-quality drywall finish not only enhances the aesthetics of your property but also adds value and durability. In this article, we’ll walk you through the process of drywall finishing , breaking down each step to help you achieve professional results. What is Drywall Finishing? Drywall finishing involves applying joint compound (often called "mud") to the seams, joints, and screw holes of drywall sheets to create a smooth, seamless surface. The goal is to make the walls or ceilings ready for painting, texturing, or wallpapering. This process includes several stages, from applying the initial coat of compound to sanding and priming for a flawless finish. Why is Drywall Finishing Important? Aesthetic Appeal : A well-finished wall enhances the overall look of your home or office. Durability : Proper finishing helps protect the drywall from damage and wear over time. Value Addition : High-quality drywall finishing can increase the resale value of your property. The 5 Levels of Drywall Finishing Before diving into the step-by-step process, it’s helpful to understand the different levels of drywall finishing. The levels range from 0 to 5 , each representing a different degree of smoothness and readiness for paint: Level 0 : No finishing. Drywall is simply hung without any mud or tape. Level 1 : A single coat of joint compound over the tape. Often used in hidden areas like attics. Level 2 : Two coats of compound. Suitable for garages and utility spaces. Level 3 : Three coats of compound. Used for surfaces that will receive a heavy texture. Level 4 : Three coats, plus a light sanding. Ideal for walls that will be painted with a flat or satin finish. Level 5 : The highest level, with a skim coat applied for a perfectly smooth surface, ready for high-gloss paint or critical lighting. For most residential spaces, Level 4 is standard, but Level 5 is recommended for high-end finishes and areas with strong natural or artificial light. Step-by-Step Guide to Drywall Finishing Step 1: Preparation and Inspection Before you start, inspect the drywall installation to ensure all screws are properly set and the panels are securely attached. Remove any dust, debris, or protruding screws that could interfere with the finishing process. Tools Needed : Screwdriver, utility knife, sanding block. Tip : Use a shop vac to clean up dust from drywall surfaces for better compound adhesion. Step 2: Applying Drywall Tape Start by applying a layer of joint compound along the seams between drywall panels. Then, press paper or mesh tape into the wet compound to reinforce the joints. Paper Tape : Provides a stronger hold and prevents cracks. Mesh Tape : Easier to work with, especially for beginners, but may require more compound. Smooth out the tape using a 6-inch drywall knife , removing any excess compound to create a flat surface. Step 3: First Coat of Joint Compound (Mudding) Once the tape is in place, apply the first coat of joint compound over all seams, corners, and screw holes. Use a 10- to 12-inch drywall knife to feather the edges, ensuring a smooth transition between the compound and the drywall surface. Tip : Apply the compound in thin layers to avoid cracking and reduce drying time. Drying Time : Allow 24 hours for the compound to dry completely before moving to the next step. Step 4: Second Coat of Joint Compound After the first coat is completely dry, lightly sand the surface with a sanding sponge or fine-grit sandpaper to remove any ridges or bumps. Wipe away dust with a damp cloth. Apply a second coat of compound, extending it a few inches beyond the edges of the first coat to create a wider, more seamless blend. Use a larger drywall knife for this step to achieve a smoother finish. Step 5: Third Coat of Joint Compound The third coat, also known as the final coat , is applied to perfect the surface. This coat should be even thinner than the previous ones, focusing on filling in any remaining imperfections. Tip : Feather the edges as much as possible to avoid visible lines after painting. Drying Time : Again, let it dry for 24 hours before sanding. Step 6: Sanding the Surface Once the final coat is dry, it’s time to sand the entire surface to achieve a smooth finish. Use a sanding pole or a sanding block with fine-grit sandpaper for best results. Tip : Use a light source to check for imperfections. Hold a work light at an angle against the wall to highlight any uneven areas. Safety : Wear a dust mask and safety goggles to protect yourself from drywall dust. Step 7: Applying a Primer The last step in drywall finishing is applying a drywall primer to seal the surface and prepare it for paint. Priming helps paint adhere better and provides a uniform appearance. Tools Needed : Roller, paintbrush, primer. Tip : Use a high-quality primer to prevent flashing (uneven sheen) in the final paint job. Common Drywall Finishing Mistakes to Avoid Skipping the Primer : Not priming the walls can result in uneven paint coverage. Rushing the Drying Time : Applying additional coats before the previous one is fully dry can lead to cracks and bubbles. Using the Wrong Tape : Paper tape is best for flat seams, while mesh tape is better for patching small holes. Why Choose Barrie Drywallers for Your Drywall Finishing Needs? At Barrie Drywallers , we take pride in delivering high-quality drywall finishing services for both residential and commercial projects. Here’s why homeowners and businesses in Barrie, Ontario, trust us: Experienced Professionals : Our skilled team has years of experience in drywall finishing, ensuring a flawless result every time. Quality Materials : We use only the best compounds, tapes, and primers for a durable finish. Customer Satisfaction : We’re committed to providing exceptional service and exceeding customer expectations. Final Thoughts Drywall finishing is a critical step that can make or break the look of your interiors. By following the right process and using the correct tools, you can achieve a smooth, professional finish that enhances the beauty and value of your property. Whether you're tackling a DIY project or looking for expert help, Barrie Drywallers is here to assist you with all your drywall needs. Ready to transform your space? Contact Barrie Drywallers today for a free consultation and estimate on your next drywall finishing project!
More Posts

Contact Us!

Home

Share by: