Understanding Drywall Taping: A Crucial Step in Finishing
Drywall taping might seem like a minor detail in the overall drywall installation process, but it’s a crucial step that can significantly impact the final appearance of your walls. At Barrie Drywallers, we know that mastering drywall taping is essential for achieving a smooth, professional finish that enhances the look and durability of your drywall. In this article, we'll delve into the importance of drywall taping, the steps involved, and tips for getting it right.
What is Drywall Taping?
Drywall taping is the process of covering the joints between drywall sheets with tape and joint compound to create a seamless, smooth surface. This step helps to conceal the seams, screws, and any imperfections in the drywall, providing a finished look that’s ready for painting or other finishing touches.
Why is Drywall Taping Important?
- Smooth Appearance: Proper taping eliminates visible seams and joints between drywall sheets, creating a smooth, even surface. This is essential for achieving a professional-looking finish that enhances the overall appearance of your walls.
- Durability: Taping helps to reinforce the joints and seams, preventing cracks and other damage over time. A well-taped wall is less likely to show signs of wear and tear, ensuring long-lasting results.
- Preparation for Finishing: Taping is a foundational step in the drywall finishing process. It sets the stage for subsequent layers of joint compound and sanding, ultimately determining the quality of the final paint job or other surface treatments.
The Drywall Taping Process
- Preparation: Before you begin taping, ensure that your drywall is clean and free of dust. Fill any large gaps or holes with joint compound and allow it to dry completely. Sand the surface to create a smooth base for taping.
2. Apply the First Coat of Joint Compound: Using a drywall knife, apply a thin layer of joint compound along the seams and over the screw or nail holes. This first coat, known as the “mud,” helps to embed the tape and create a smooth surface for further layers.
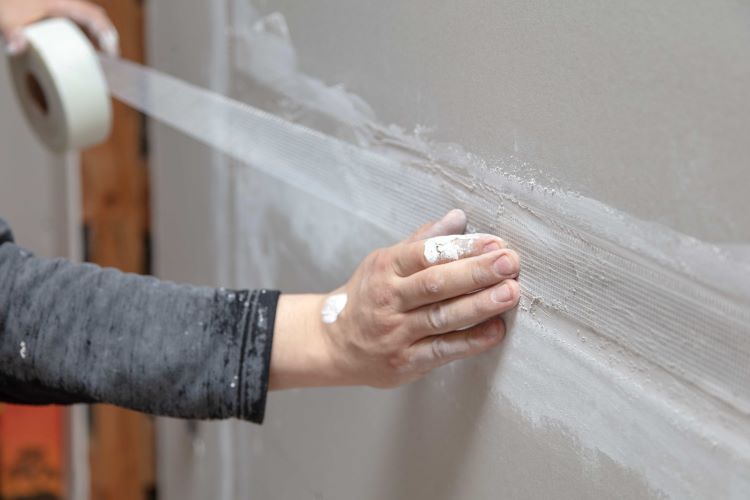
3. Apply the Tape: Place drywall tape over the wet joint compound. There are two main types of drywall tape: paper tape and fiberglass mesh tape. Paper tape is reinforced with a thin layer of adhesive and provides a smooth, strong finish, while fiberglass mesh tape is self- adhesive and is often used for its ease of application.
- Paper Tape: For paper tape, embed the tape into the joint compound using a drywall knife. Smooth out any wrinkles or bubbles, ensuring that the tape is firmly attached to the surface.
- Fiberglass Mesh Tape: For fiberglass mesh tape, apply it directly to the joint compound, pressing it into place with a drywall knife. This type of tape requires a thin layer of joint compound to be applied over it to complete the process.
4. Apply Additional Coats: After the tape is in place, apply additional coats of joint compound over the seams, feathering the edges to blend with the surrounding wall. Allow each coat to dry completely before applying the next. Typically, two to three coats are needed to achieve a smooth, even finish.
5. Sanding: Once the final coat of joint compound is dry, sand the surface using a sanding block or pole sander. Be sure to use a fine-grit sandpaper to create a smooth, even surface. Avoid over-sanding, which can damage the drywall or remove too much of the joint compound.
6. Inspect and Touch Up: After sanding, inspect the wall for any imperfections or areas that need touch-ups. Apply additional joint compound and sand as needed to ensure a flawless finish.
Tips for Successful Drywall Taping
- Use Quality Tools: Invest in high-quality drywall knives, sanders, and other tools to make the taping process easier and more efficient. Proper tools help achieve a smoother finish and reduce the risk of mistakes.
- Be Patient: Allow each coat of joint compound to dry completely before applying the next. Rushing the process can lead to uneven surfaces and poor results.
- Apply Thin Coats: Apply joint compound in thin, even layers. Thick coats can lead to cracking and longer drying times. Feathering the edges helps to blend the compound seamlessly with the surrounding wall.
- Maintain a Clean Work Area: Keep your work area clean and free of dust. Dust and debris can interfere with the adhesion of the joint compound and tape, leading to an uneven finish.
- Practice Consistency: Consistency is key to achieving a professional-looking finish. Apply joint compound and tape with uniform pressure and smooth out any imperfections as you go.
Drywall taping is a critical step in the drywall finishing process that requires skill and attention to detail. By understanding the importance of taping and following the proper techniques, you can achieve a smooth, seamless finish that enhances the appearance and durability of your walls.
At Barrie Drywallers, we’re dedicated to providing expert drywall services, ensuring that your project is completed to the highest standards. Whether you’re tackling a DIY project or need professional assistance, we’re here to help you achieve outstanding results.
Contact us today to learn more about our drywall services and how we can assist with your next project.
You Might Also Enjoy:


Contact Us!